Paper Christmas

For christmas I made few bodlinkas in christmas colors. They are magical.


Dračí Trn - Dragon Thorn

Long time I didn't have time for folding. I got nice paper to my birthday, then I had to fold something. I put together red silk paper, al foil and decorated red silk paper. Here is Dragon Thorn.


Now I have dragon kindergarden.

My baby Lucka have two months.

My baby have two month and my love have made her beautiful photos and photo collages.


First judo training with baby Lucka

First month is behind us. I clothed Lucka baby kimono and then we trained. We trained cool face and battle cry ;-)


Bodlinka - my modifi curler unit

I design my kusudama unit. I hybridizated Krystyna Burczyk 'Twirls' and Lukasheva Ekaterina 'Fish curlers'. These parents had a baby. I named him Bodlinka.
I thing, my new design is easier then Fish curler and more elegant than Twirl.


Diagram for my design. The base isn't square but rhombus. Then we can make some traditional fulleren.

New spiny curler

Make spiny curler from square use much paper. I tried it make curler from rhombus. Fold it from rhombus is easier than from squares, but cut rhombus is more difficult than squares. Next time I'll try use colour paper, maybe I'll paint myself.

paper: 30 pcs rhombus (70°) 40 x 40 mm
model: Ø60 mm


paper: 30 pcs rhombus (60°) 35 x 35 mm
model: Ø55 mm

My first baby - Lucka

With my girlfriend we gave a name Lucka. She was born, last Tuesday. She was weight 3.2Kg and she was tall 0.5 m. She is very pretty and she will be warrior princess.


Lord of the rings - Elf

Here is fifth part of the Lord of the ring collection. Elf designed by Hoang Trung Thanh. Something about elves is here on wikipedia.

Tenzen
paper: 500 x 500 mm 70 g/m²
model: 190 mm, height
design: Hoang Trung Thanh
book: 50 Hours of Origami +


Hatsune Miku

Last month I had mood for folding a figures. The first figure which I have folded is Hatsune Miku. She is some anime girl with long turquoise hair.

Hatsune Miku
paper: 500 x 500 mm 70 g/m²
model: 170 mm height
design: ObeLisK_G Fan


Wild boar

I have my first forest animal the wild boar. I designed myself. I hope I will make a diagram.

paper: 150 x 150 mm
model: 90 x 50 mm
design: Charles Smith (myself)


Drtící Stín - Crushing Shadow

Here is my third dragon from paper, which I made myself. I named him Drtící Stín ( Crushing Shadow ) because he has dark black colour. He is very dangerous ;-)

paper: 245 x 245 mm ( homemade tissue paper )
model: 150 x 65 x 100 mm
designer: Kade Chan


Lord of the rings - Treebeard

Here is fourth part of the collection. Ent named Treebeard designed by Andrey Ermakov ( Андрей Ермаков - website ). Something about Treebeard is here on wikipedia.

Ent
paper: 50 x 50 cm, 30 g/m²
model: 18 x 11 x 12 cm
design: Andrey Ermakov


Lord of the rings - Gandalf

Here is third part of the collection. Gandalf designed by Satoshi Kamiya. Something about Gandalf is here on wikipedia.

Wizard
paper: 240 x 240 cm, 30 g/m²
model: 80 x 55 x 82 mm
design: Satoshi Kamiya


Lord of the rings - Balrog

I'm making on Lord of the rings collection. Here is second part of the collection. Balrog designed by Jason Ku. Something about Balrog is here on wikipedia.

Balrog
paper: 500 x 500 mm; 30 g/m²
height: 55 mm
tentacles: 240 mm
tail: 160 mm
design: Jason Ku


Jak vytvořit kusudamu Toskul

Navrhl jsem svou vlastní novou ozdobnou kouli kusudama a chci se s vámi podělit. Pojmenoval jsem ji Toskul. Mám tady pro vás fotonávod jak si ji vytvořit.

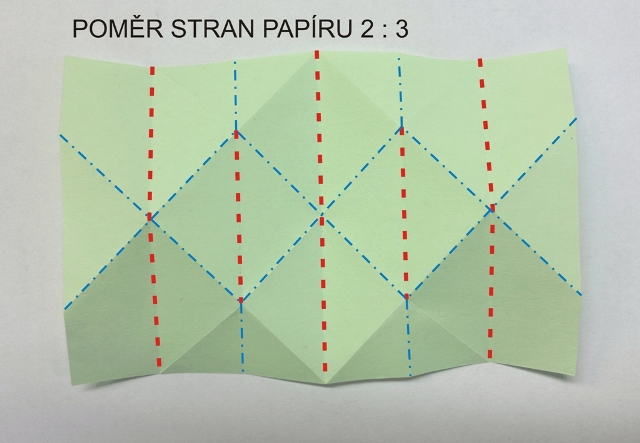
Je zapotřebí 30 papírú s poměrem stran 2 : 3 třeba 10 x 15 cm.

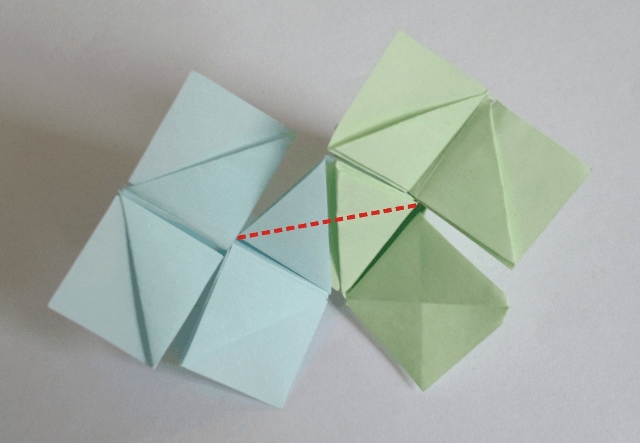
1. Začínáme ohyby dle nákresu. Čárkované ohyby ohnout k sobě, čerchované od sebe.
image
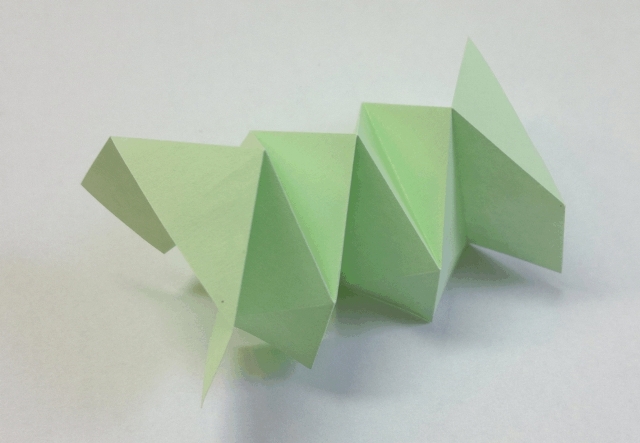
2. Tak vypadá výsledek prvních ohybú
image
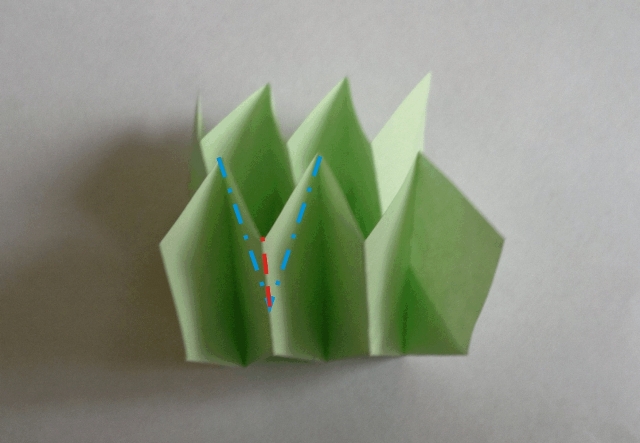
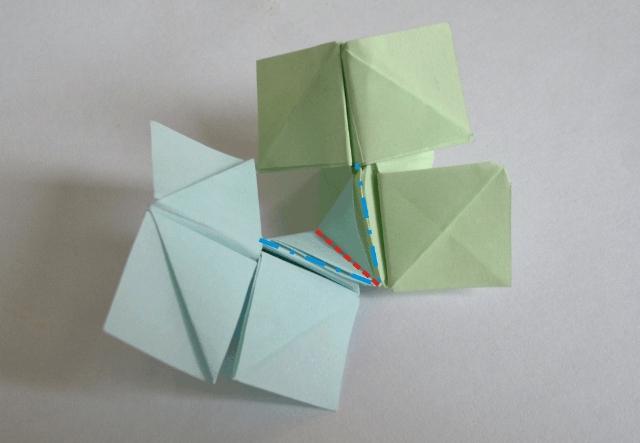
3. Ohneme rožek jak je naznačeno a zopakujeme to i na zadní straně
image
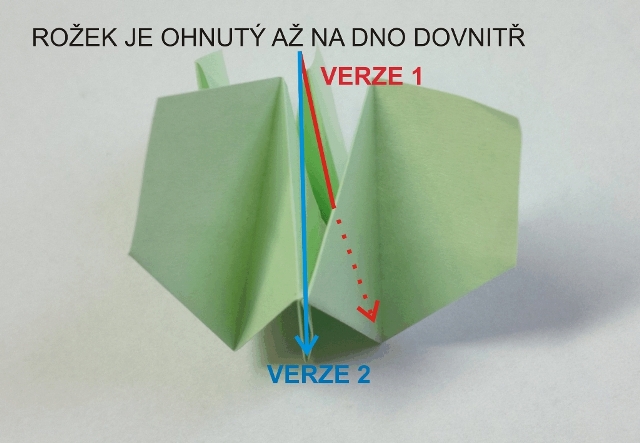
4. Ohneme rožek jak je naznačeno. Pro první verzi ho ohneme dovnitř, pro verzi druhou ho ohneme rovně dolú dopředu.
image
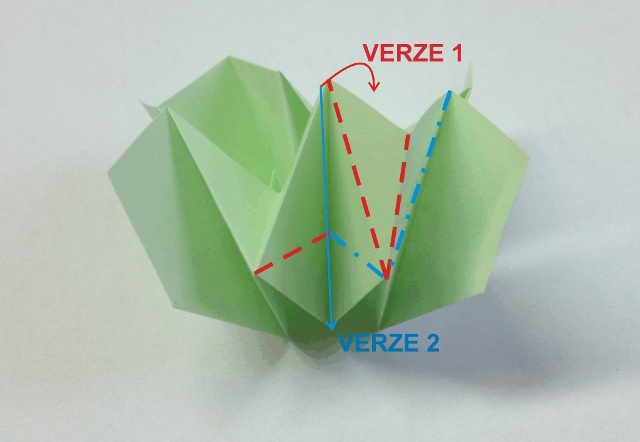
Totéž provedeme na zadní straně
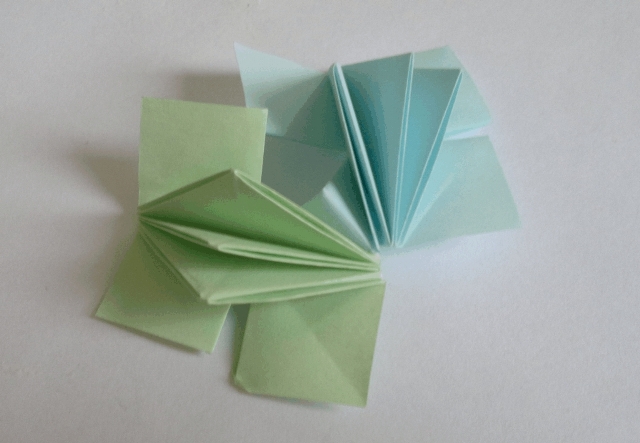
výsledek verze 1:
image
5. Horní "pacičky" ohneme dolú, dva přední a dva zadní
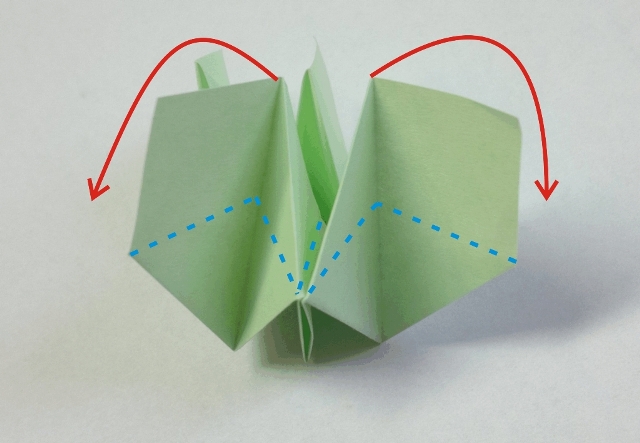
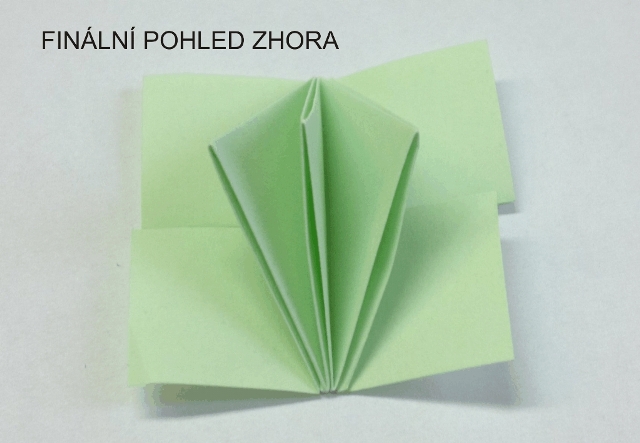
image
Hotový dílek:
image
image
6. Vyrobíme 30 dílku ( lze sestavit i jiné tvary z jiného počtu )
Pacičku jednoho dílku zasuneme do druhého
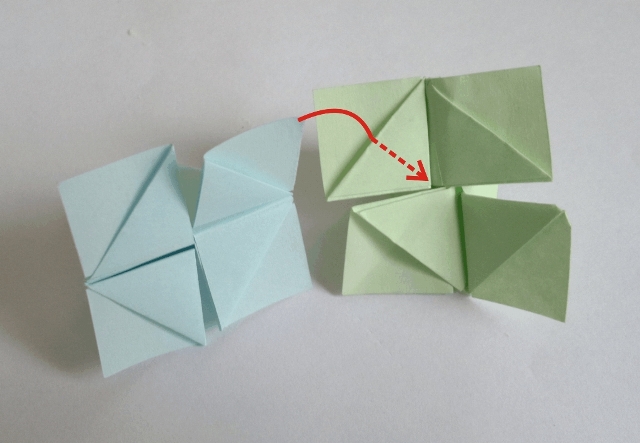
image
7. Volný rožek ohneme
image
8. Vytvořením ohybú dle fotky vznikne spoj dostatečně pevný, aby pohodlně unesl váhu budoucího celku
image
image
9. Dílky spojíme do pěticípé hvězdičky a pak stejně pokračujeme až do zakulacení tvaru. Na konec zaoblíme volné lístky. Mě se nejvíc osvědčila špejle při rulování lístkú.
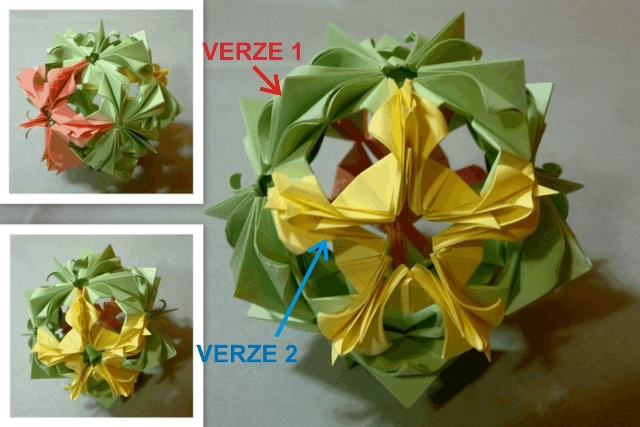
image
10. Pro inspiraci jiných tvarú výsledné sestavy nahlédněte třeba na fullereny ve wikipedii.
Doufám že se vám kusudama líbí a Toskul vyzkoušíte. Pokud budete mít nějaké nejasnosti, napiště mi a zkusím návod doplnit.
Tuskul jsem osobně vymyslel v únoru 2013 - Charles